Configure Your Profile
Once you are signed in to your MoreLogin account, the default interface that opens up is ‘Browser Profile’. You can check this from the navigation bar on the left where the ‘Browser Profile’ category is selected.
On the right window, notice that MoreLogin automatically created a profile for you with the default ‘P-1’ name.
You can follow the instructions given below to customize this default profile and set it up to function properly:
Rename the Profile
· Hover the mouse over the name of the profile
· Click the Edit (Pencil) icon · Type a new name in the input field
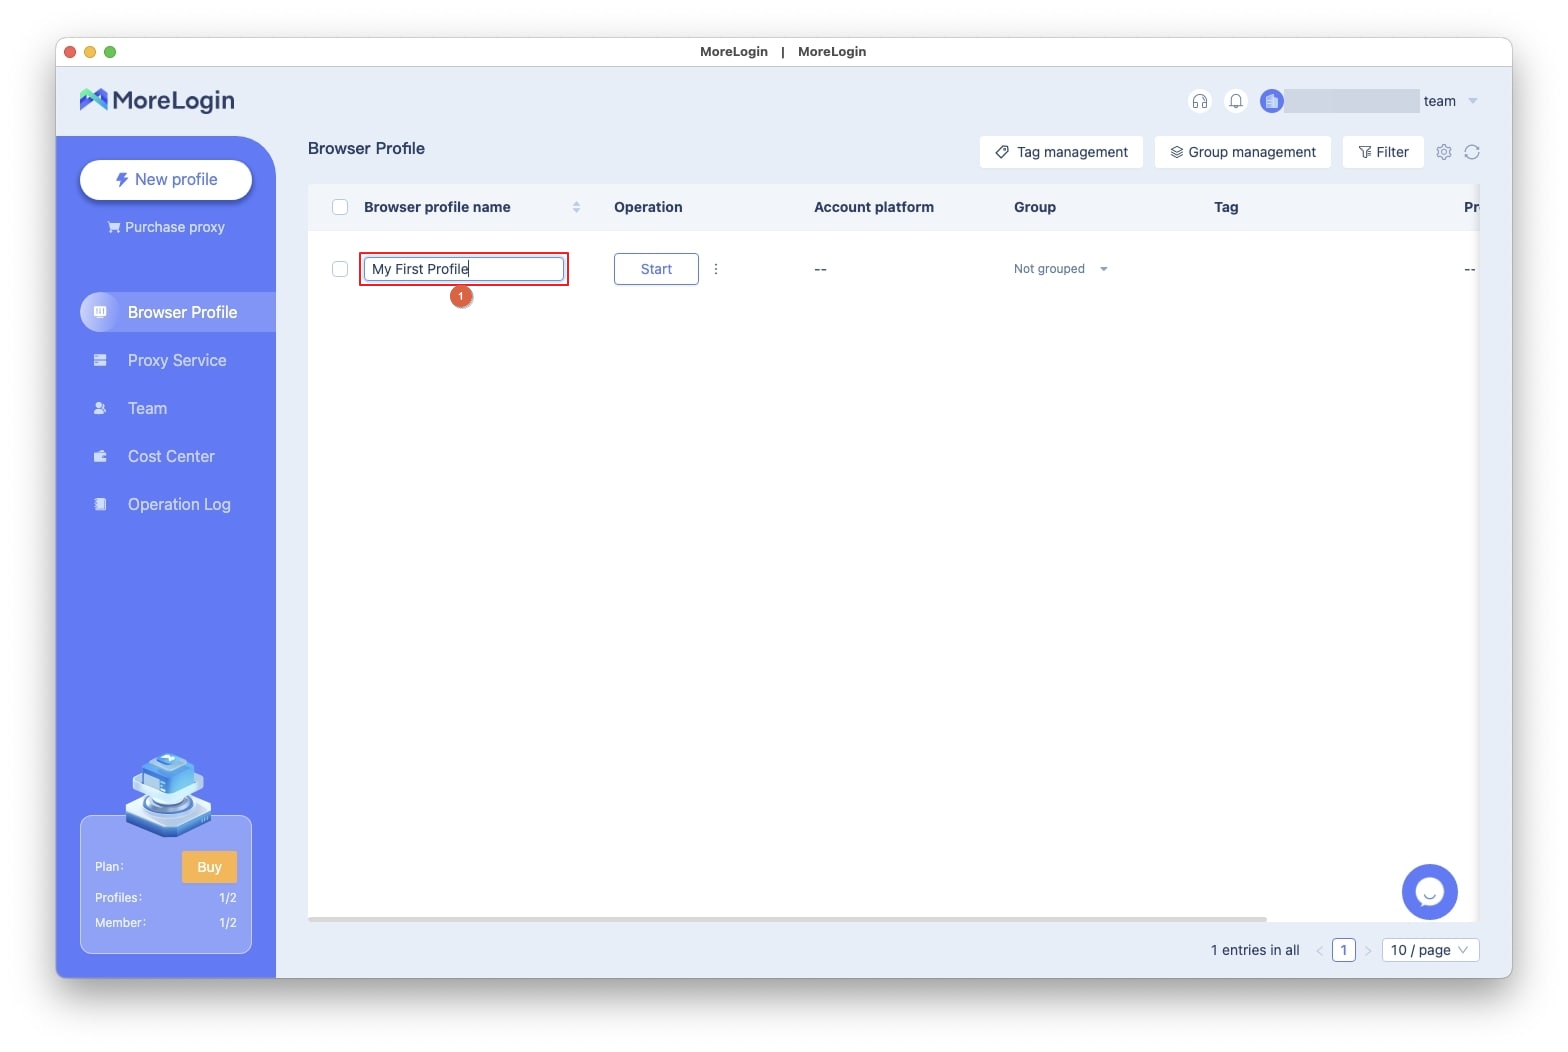
· Press Enter to save the changes
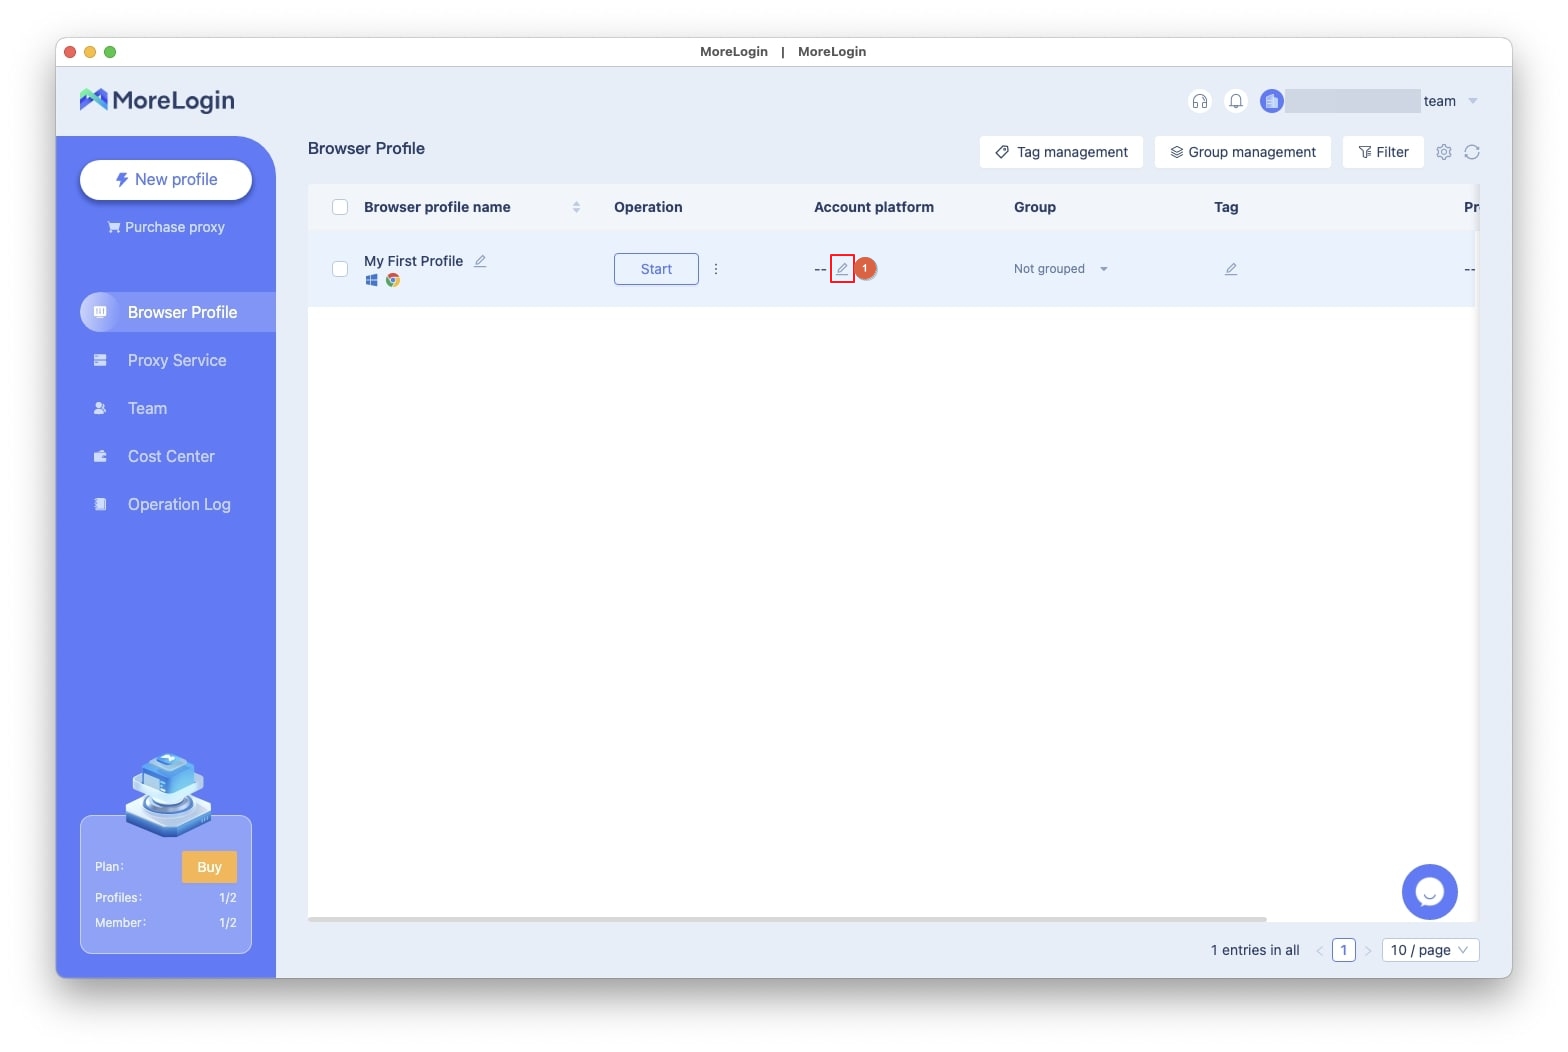
Define Target Platform
· Hover the mouse over the name row
· Click the Edit (Pencil) icon under the Account platform column
· Click anywhere inside the Account platform field on the Edit Account Information box
· Go to your preferred tab according to the platform you want to add to MoreLogin (Ecommerce Platform is selected here for illustration)
· Choose a site from the left pane
· Click to select the region of your choice from the right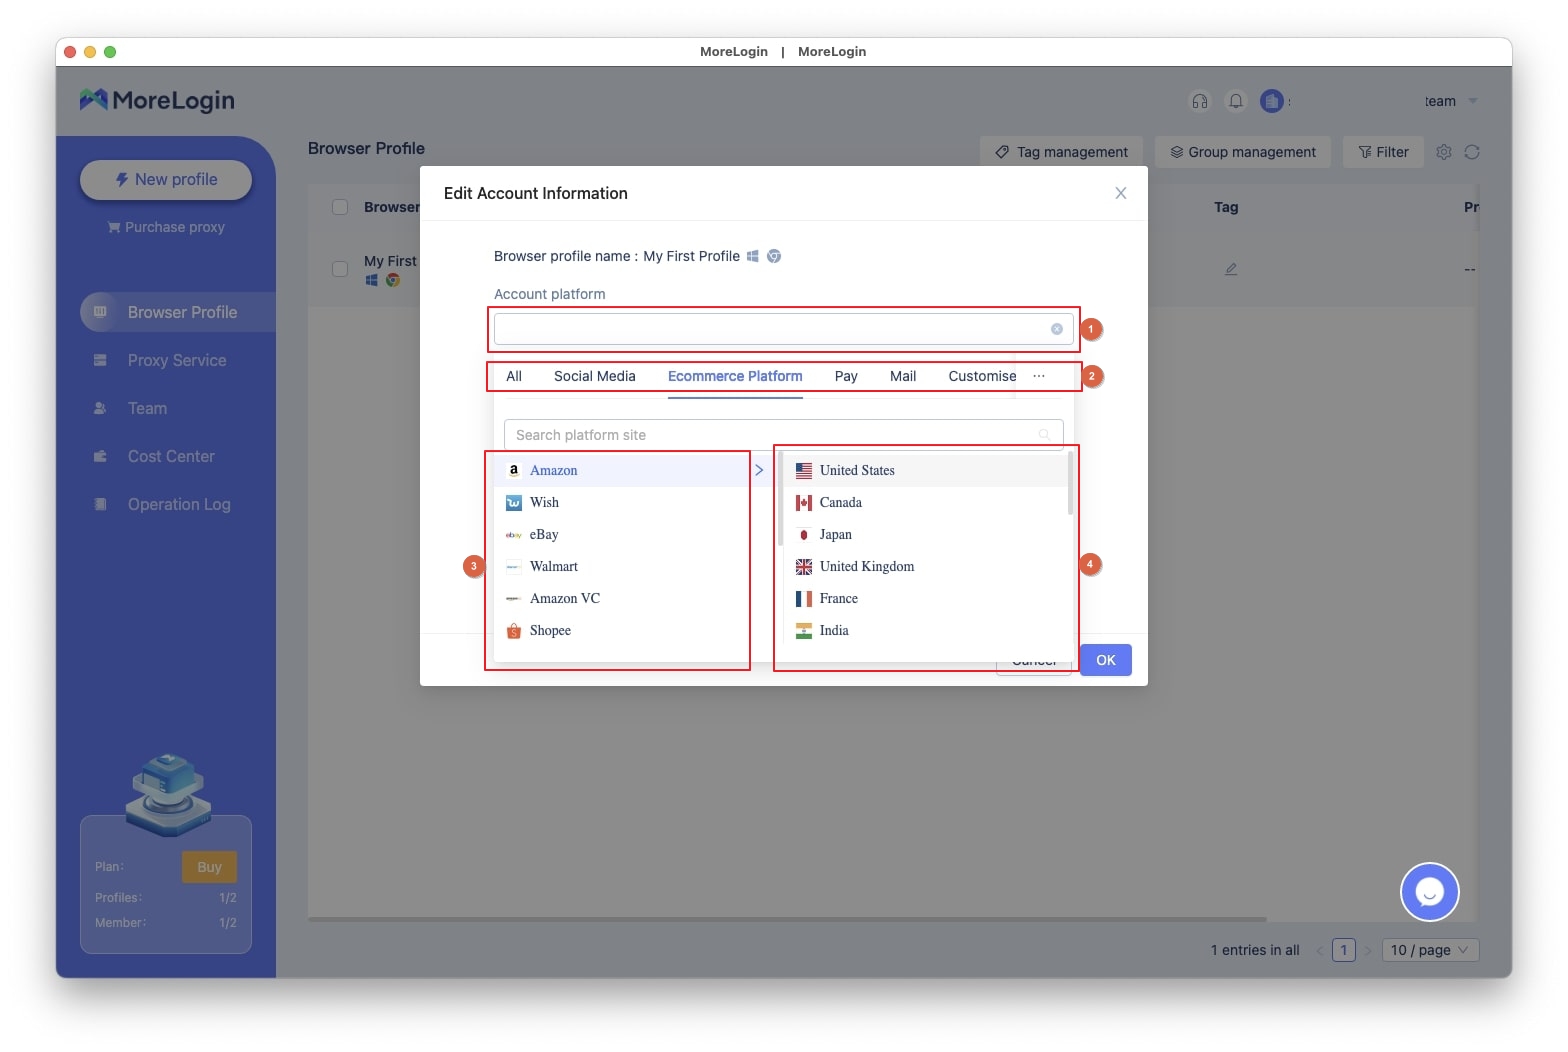
· Back on the previous box, add your account’s login credentials
· Click OK from the bottom-right area to save the changes
Add the Profile to a Group
· Hover the mouse over the name row again
· Click the arrow under the Group column
· Enter a name for the new group
· Click Add to create a group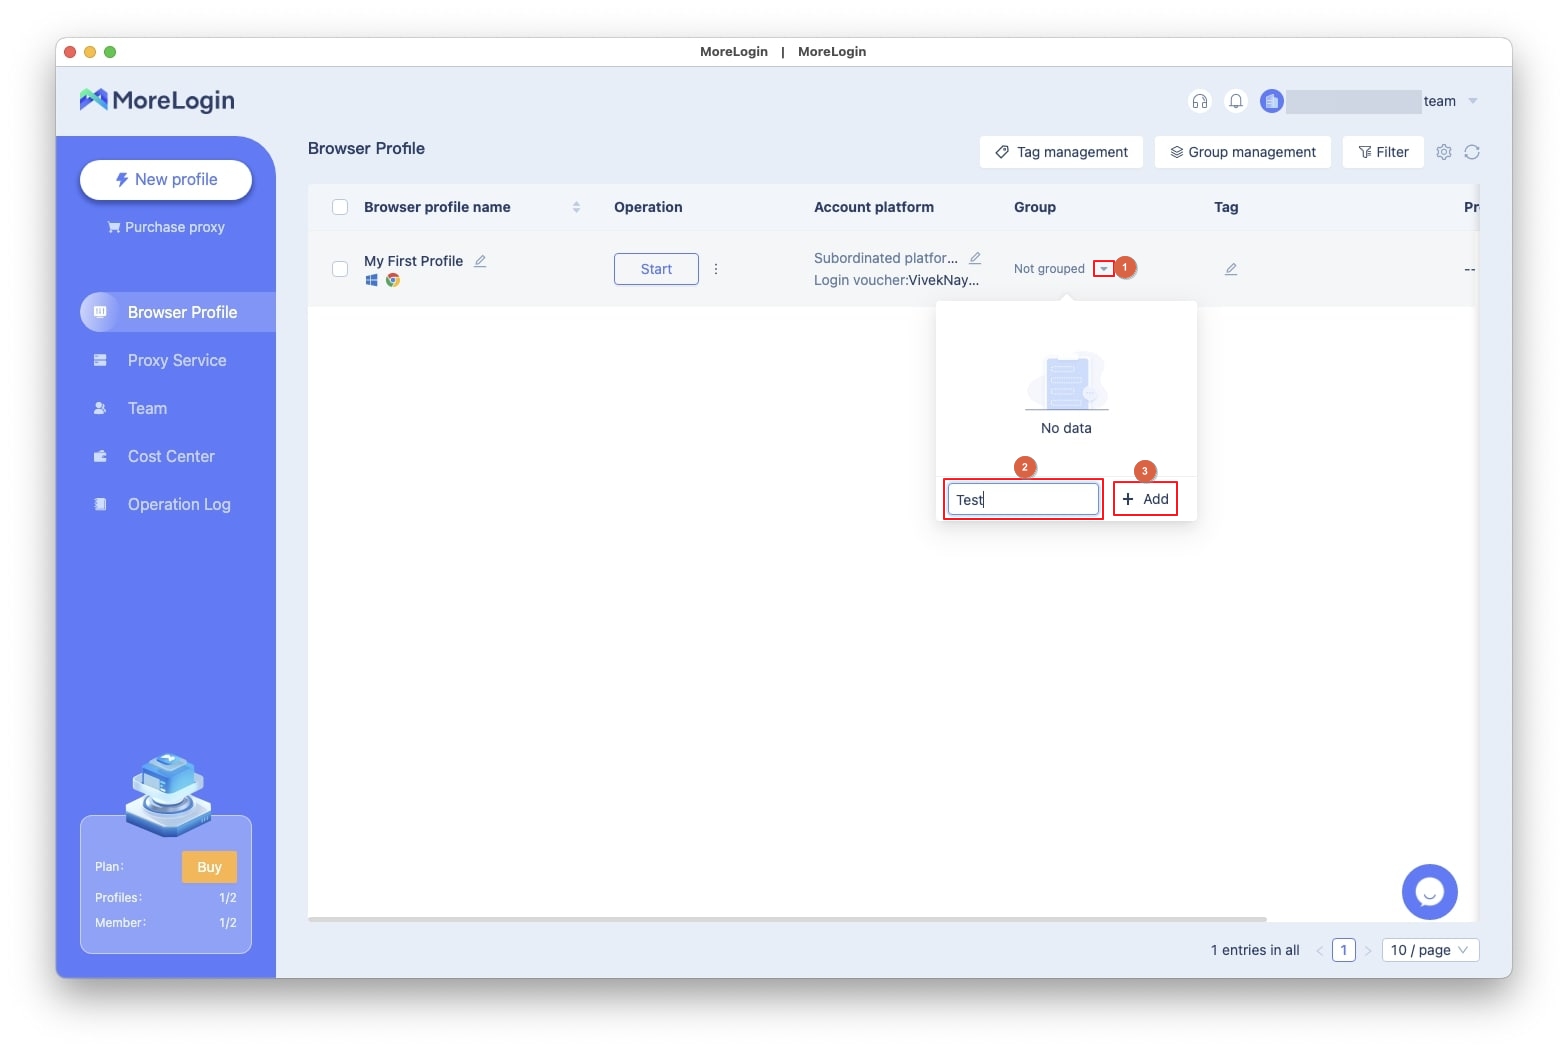
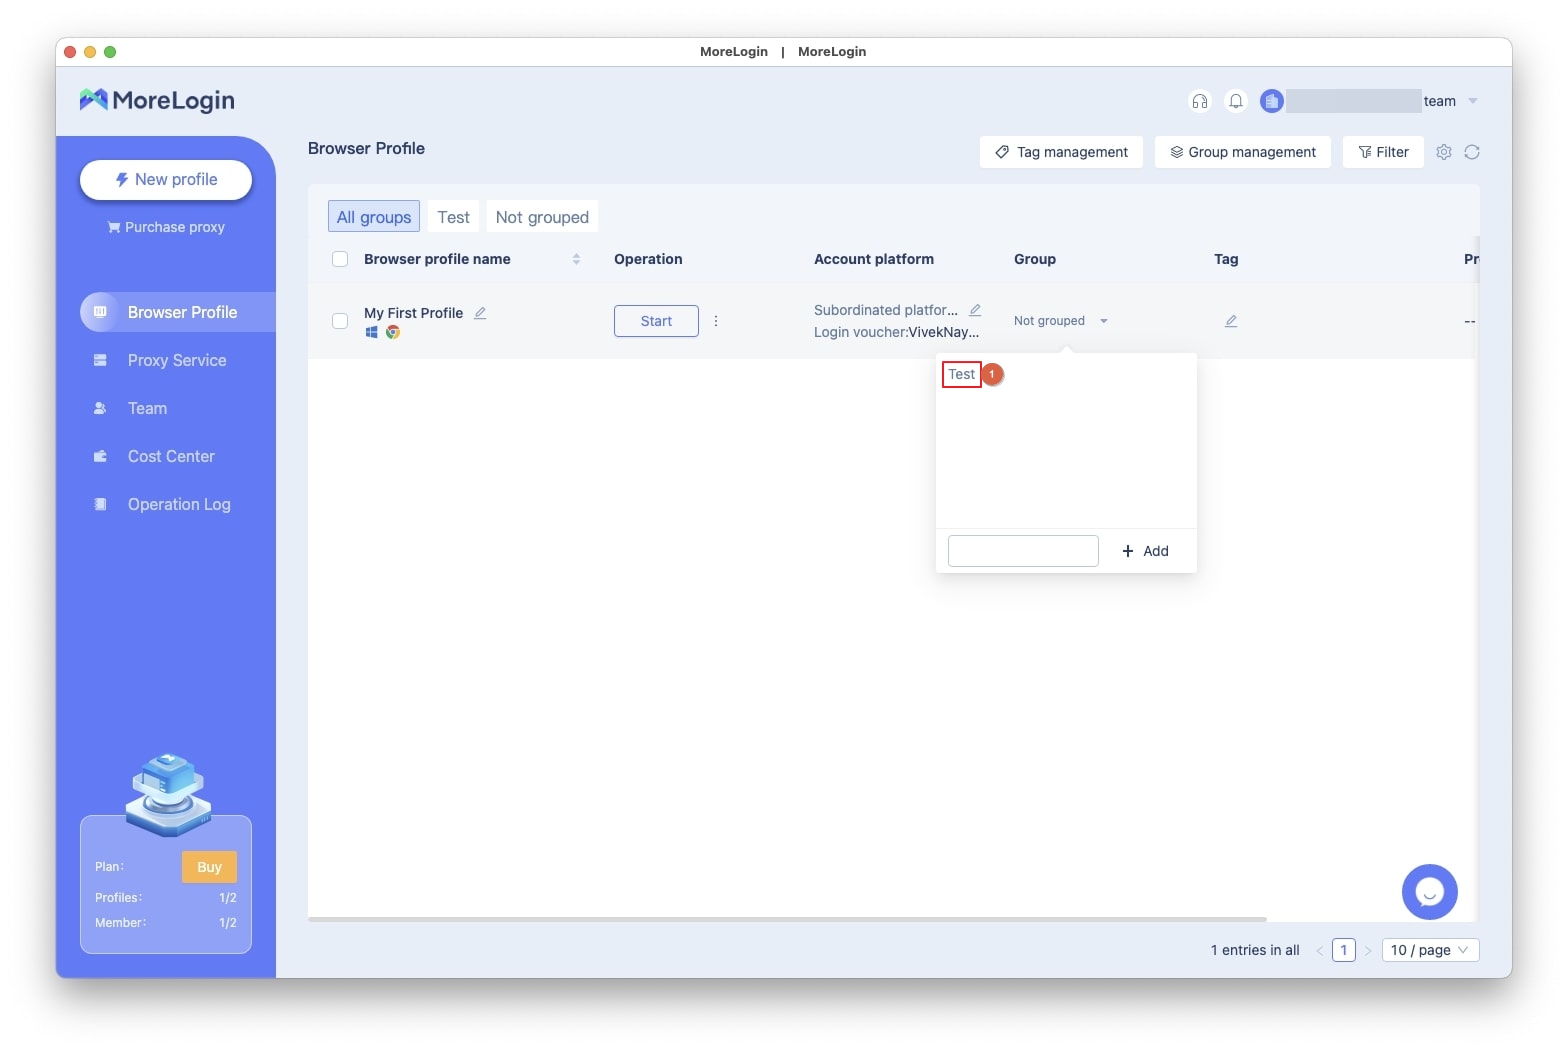
· From the same box, click the group you created to add your profile to it
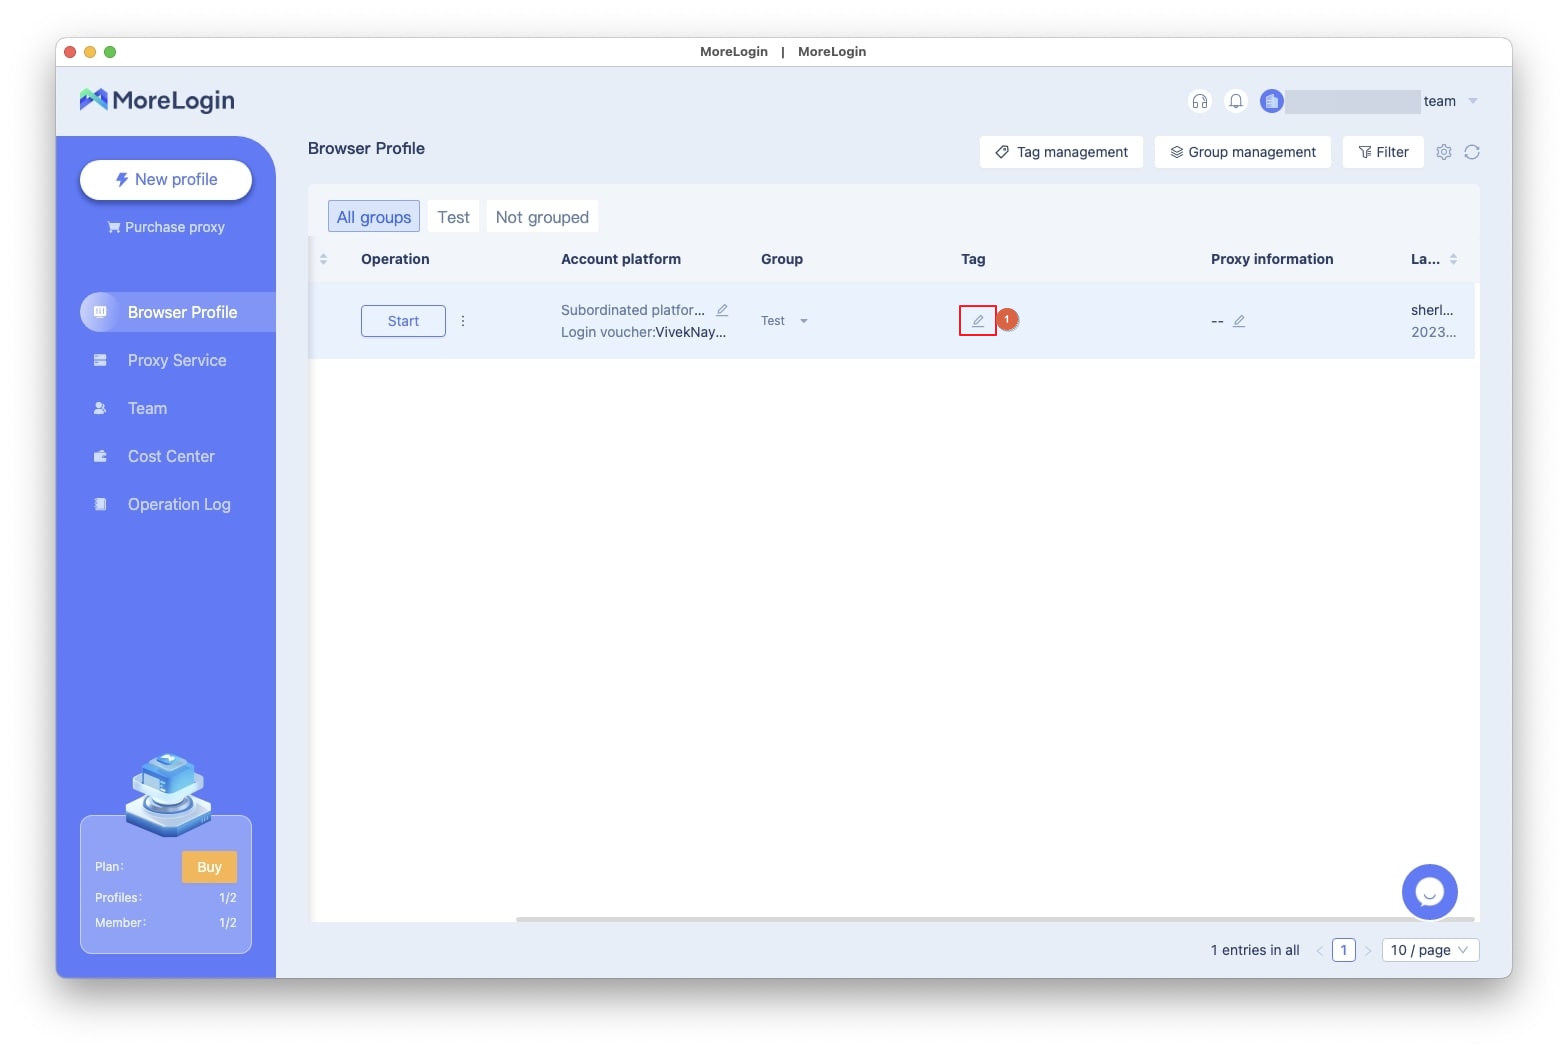
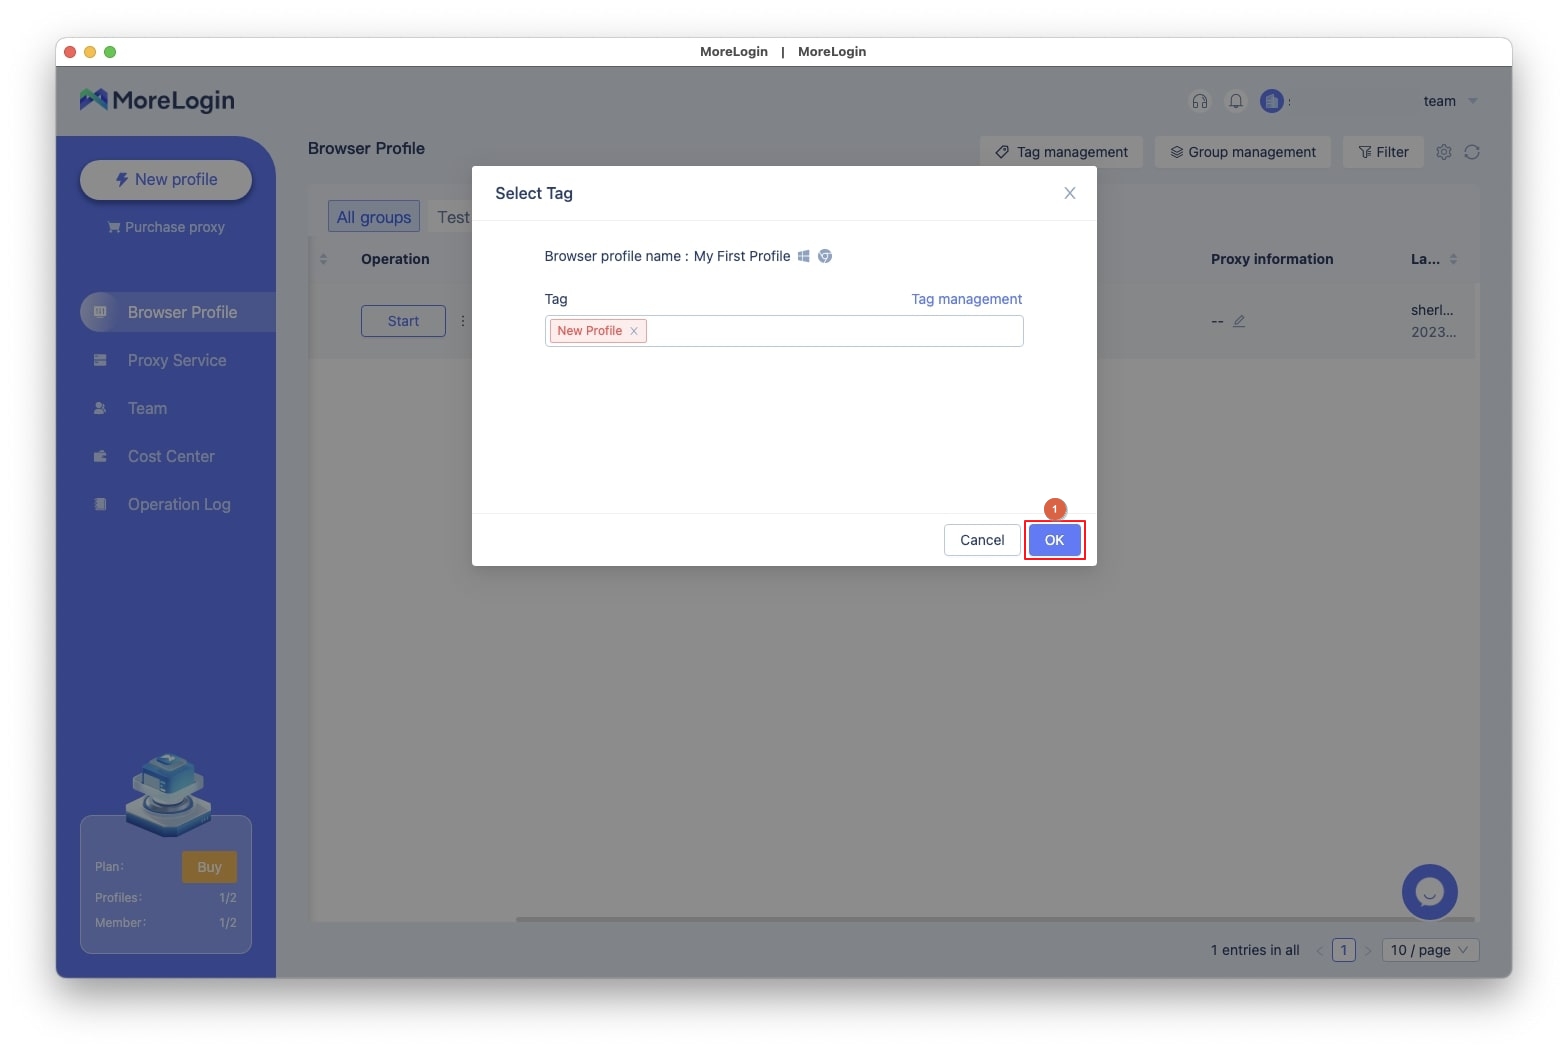
 Define Tags
· Hover the mouse over the name row
· Click the Edit (Pencil) icon under the Tag column
Click inside the Tag input field
If no tag is available, enter a name for a new tag in the input field at the bottom of the new box that drops down
Click Add
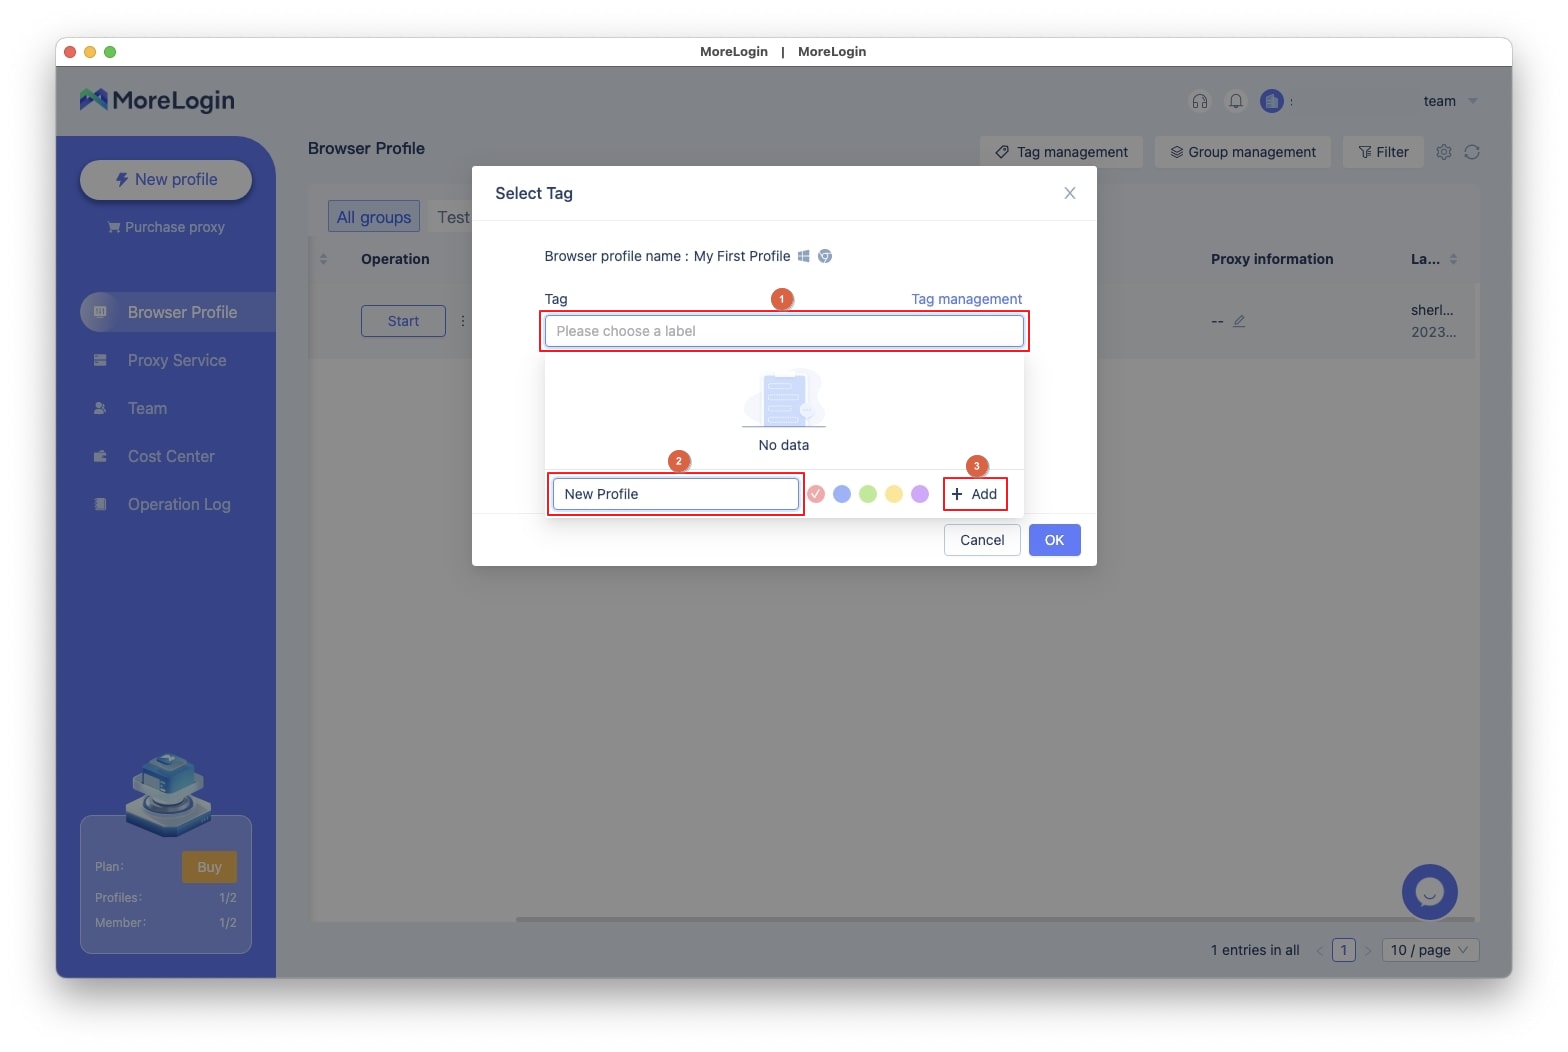
Back on the previous section, click the tag name
Click OK from the bottom-right to save the changes
 Bind Your Profile to a Proxy
Hover the mouse over the profile row
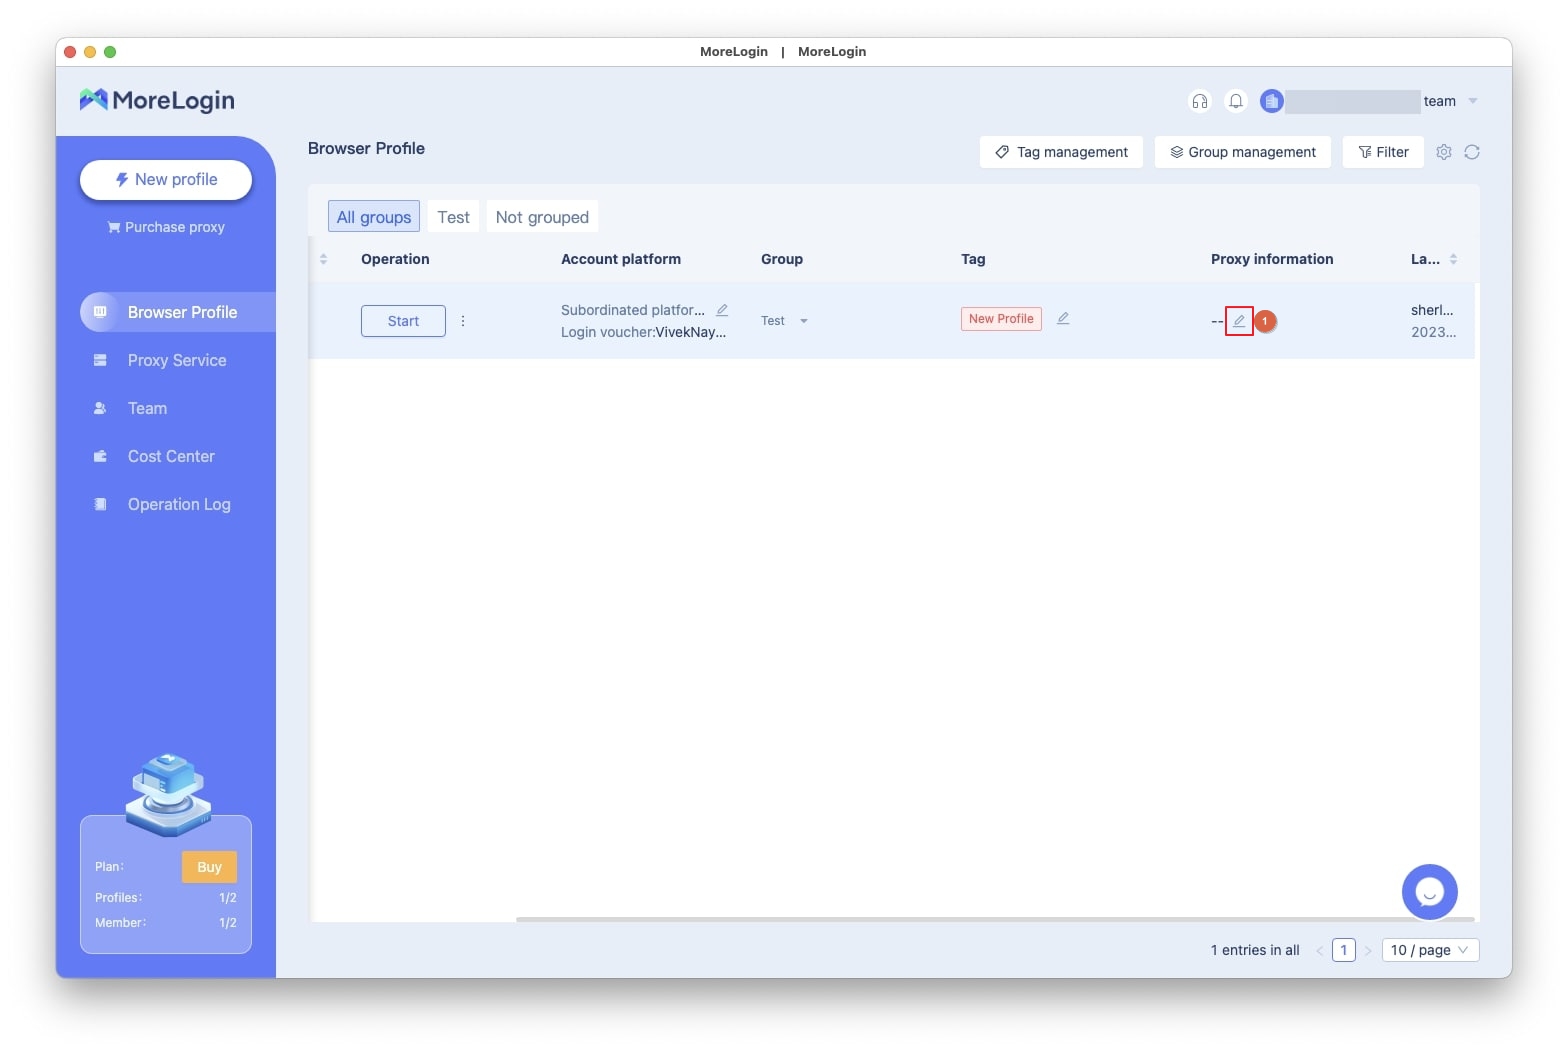
Click the Edit (Pencil) icon under the Proxy information columnClick
Add proxy from the Choose Current Proxy box
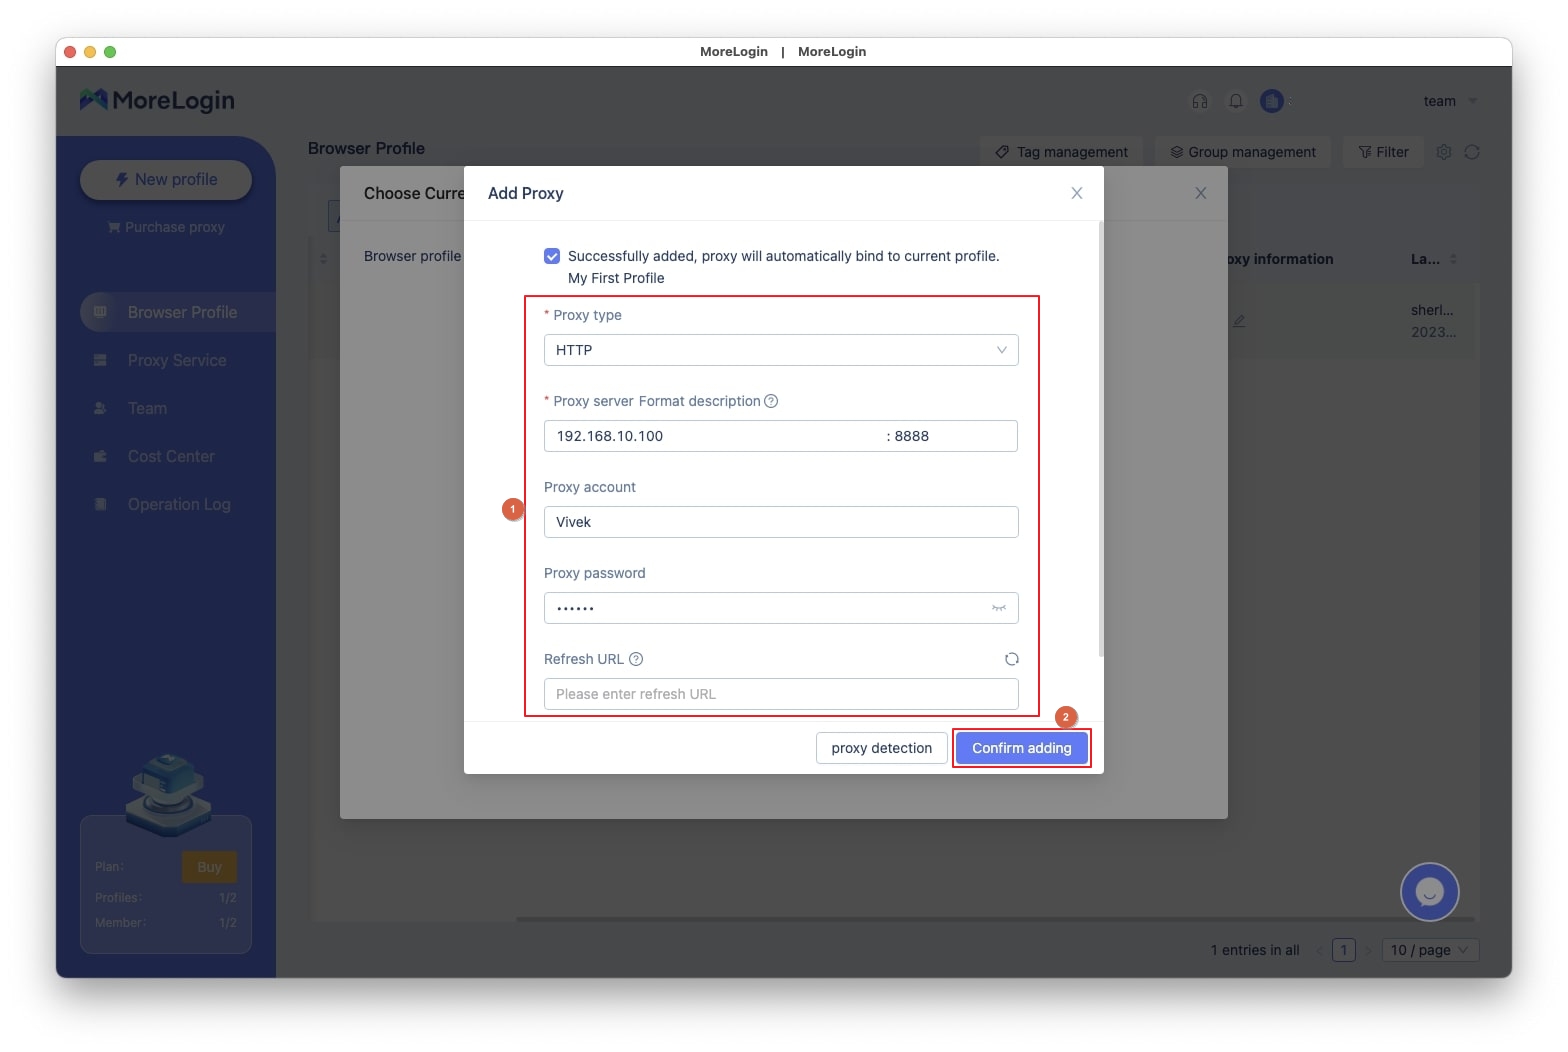
 Populate the fields in the Add Proxy box with their relevant information
Click Confirm adding from the bottom-right
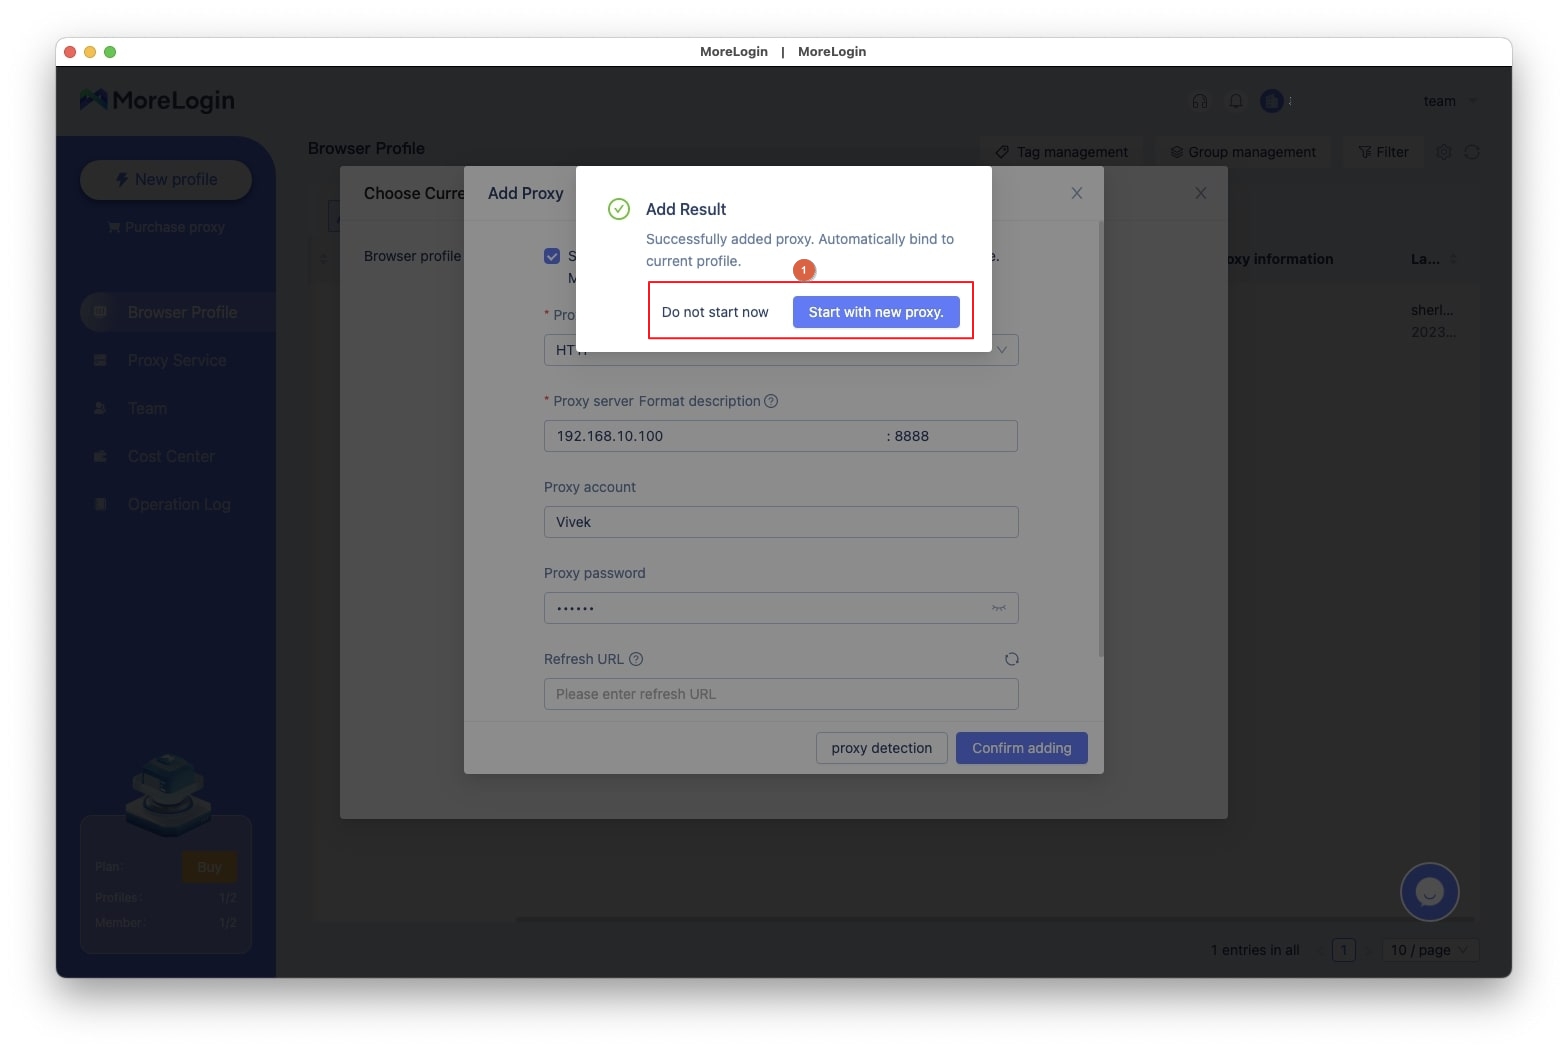
On the Add Result box that pops up, click Start with new proxy to start using the proxy, or click Do not start now to start it later


Antidetect browser for multi-account management on All platform.Securely manage account to prevent detection or blockage
Free trial