How to Integrate MoreLogin Browser with Infatica Proxies
If you want to manage multiple accounts online without getting banned, you might want to consider using Infatica proxies and the MoreLogin browser. Infatica proxies provide high-quality IP addresses from different locations and ISPs. At the same time, the MoreLogin browser protects your digital fingerprint and allows you to create thousands of browser profiles on a single computer. This guide will show you how to integrate Infatica proxies into the MoreLogin browser and enjoy the benefits of secure and anonymous web browsing.
What is Infatica?
Infatica is a proxy provider that offers residential, mobile, and data centre proxies for various purposes, such as web scraping, market research, brand monitoring, cybersecurity, and more. It has a large pool of high-quality IP addresses from different locations and ISPs. Infatica also provides web scraping APIs and self-managed scraping services. Infatica claims to have a high success rate, reliable performance, and ethical sourcing of proxies.
Most importantly, Infatica is an ethical proxy provider: Its network peers provide informed consent to lease their IP addresses – and receive various rewards for their participation. This helps to create a healthier proxy ecosystem and more stable proxy network performance.
Key features of Infatica proxies
Here are 9 features that Infatica customers find most impactful:
100+ geolocations: IP geotargeting across North America, South America, Europe, and Asia.
10+ million residential IPs: HTTP/SOCKS proxies sourced from residential ISPs.
Unlimited concurrent sessions: persistent connections and cookies across multiple requests.
High performance: 99.9% success rate and 0.7s average response time
Optimized for web scraping: fewer IP bans and CAPTCHAs thanks to rotation and real user devices.
API for power users: easy user management and integration with third-party software.
Flexible pricing: pricing plans for small-, medium-, and large projects with a 3-day trial.
24/7 support: get help from our expert team anytime you need it.
Extensive documentation: proxy lists, authorization methods, location and rotation settings, and more.
How To Set Up Infatica Proxies In MoreLogin
Step 1. Get Infatica Proxies
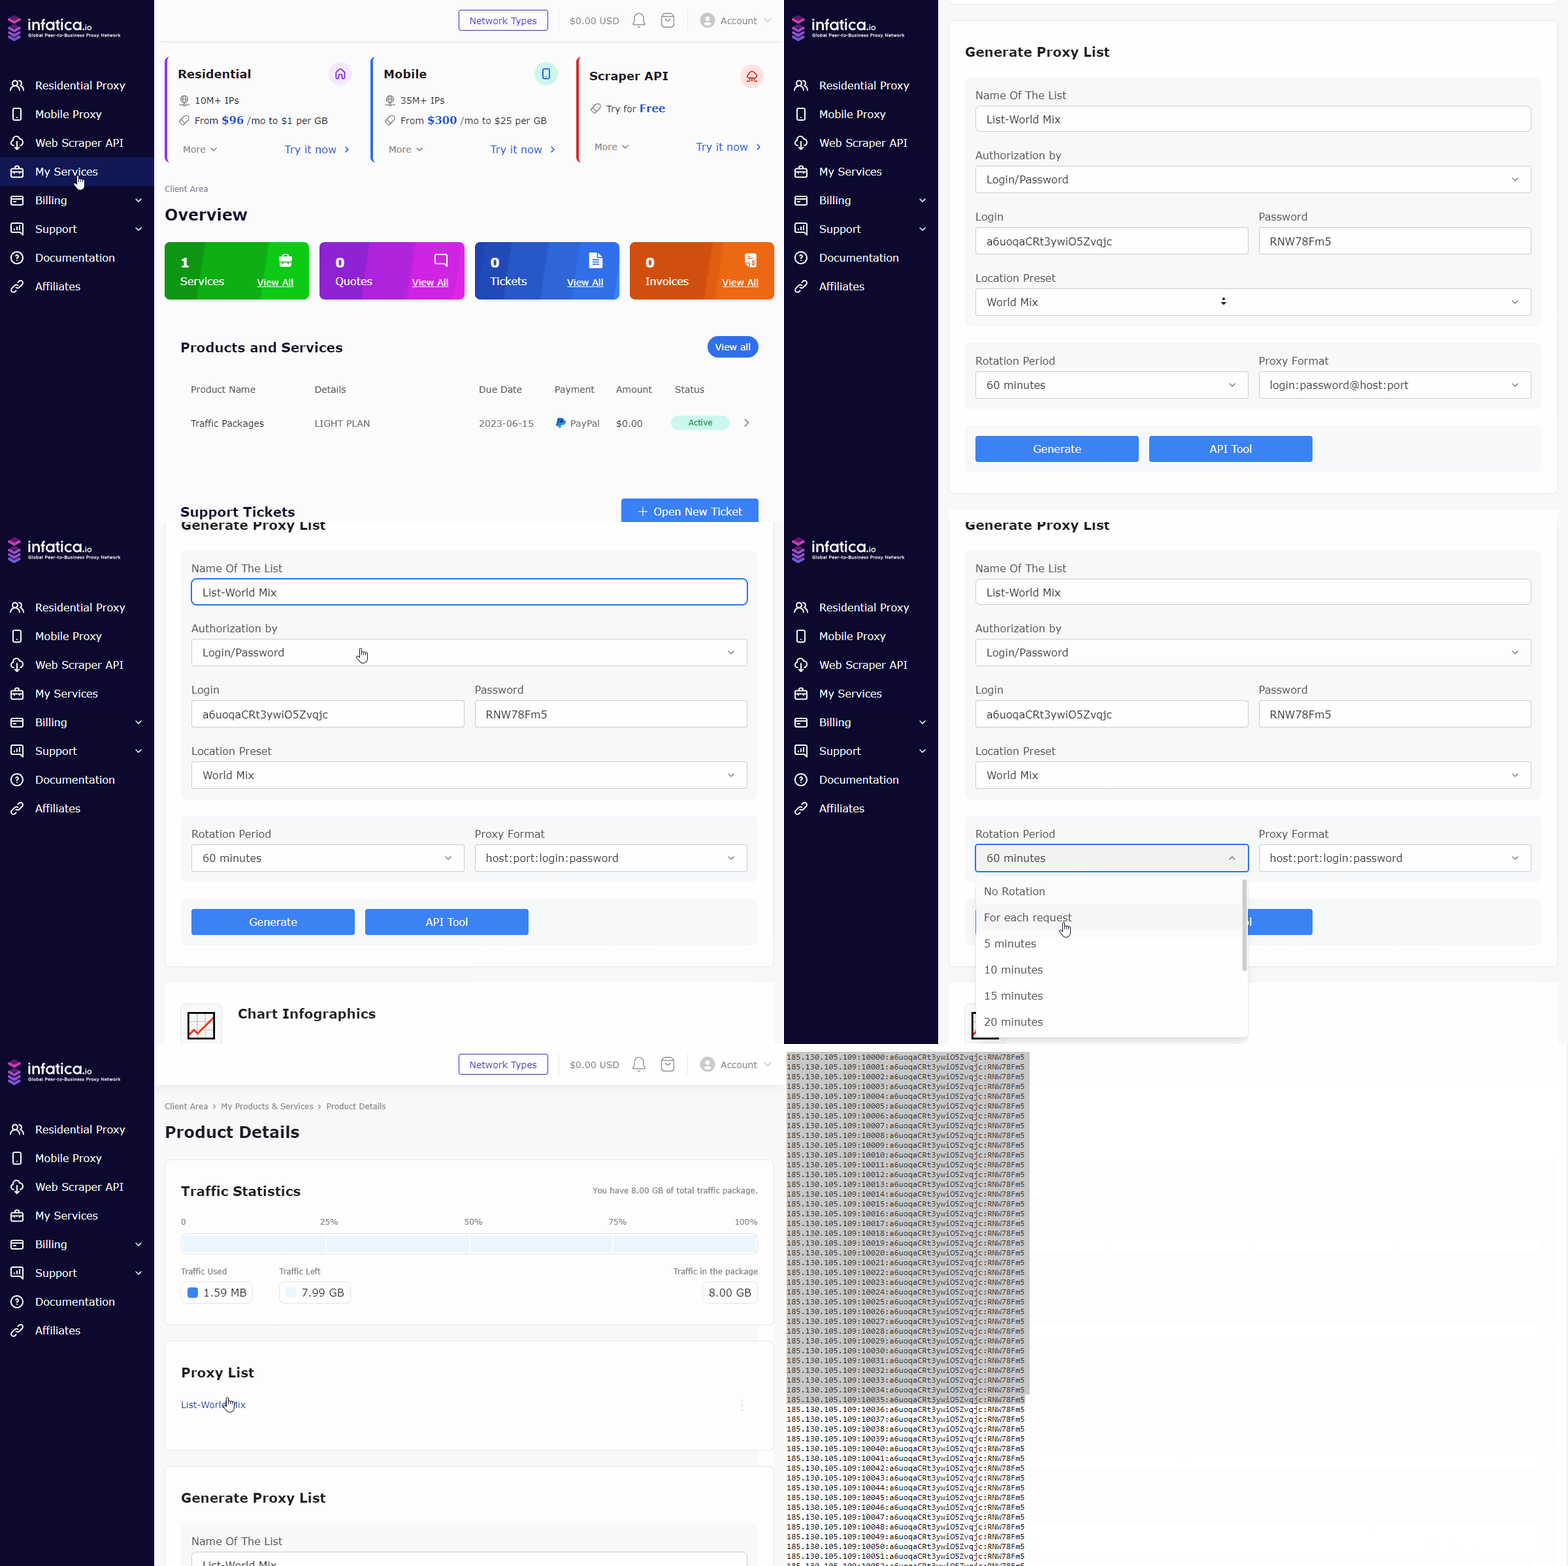
First, log in to your Infatica account and go to the My Services section. There, you will see the proxy package that you have subscribed to. Click on it and then click on the Generate Proxy List button. You will see a window where you can enter the proxy settings. Select the default proxy format, host:port:username:password. After you enter the settings, click on the Generate button. You will see a list of generated proxies. Keep this window open and move on to the next step.
Step 2. Create New Profile And Add Infatica Proxies
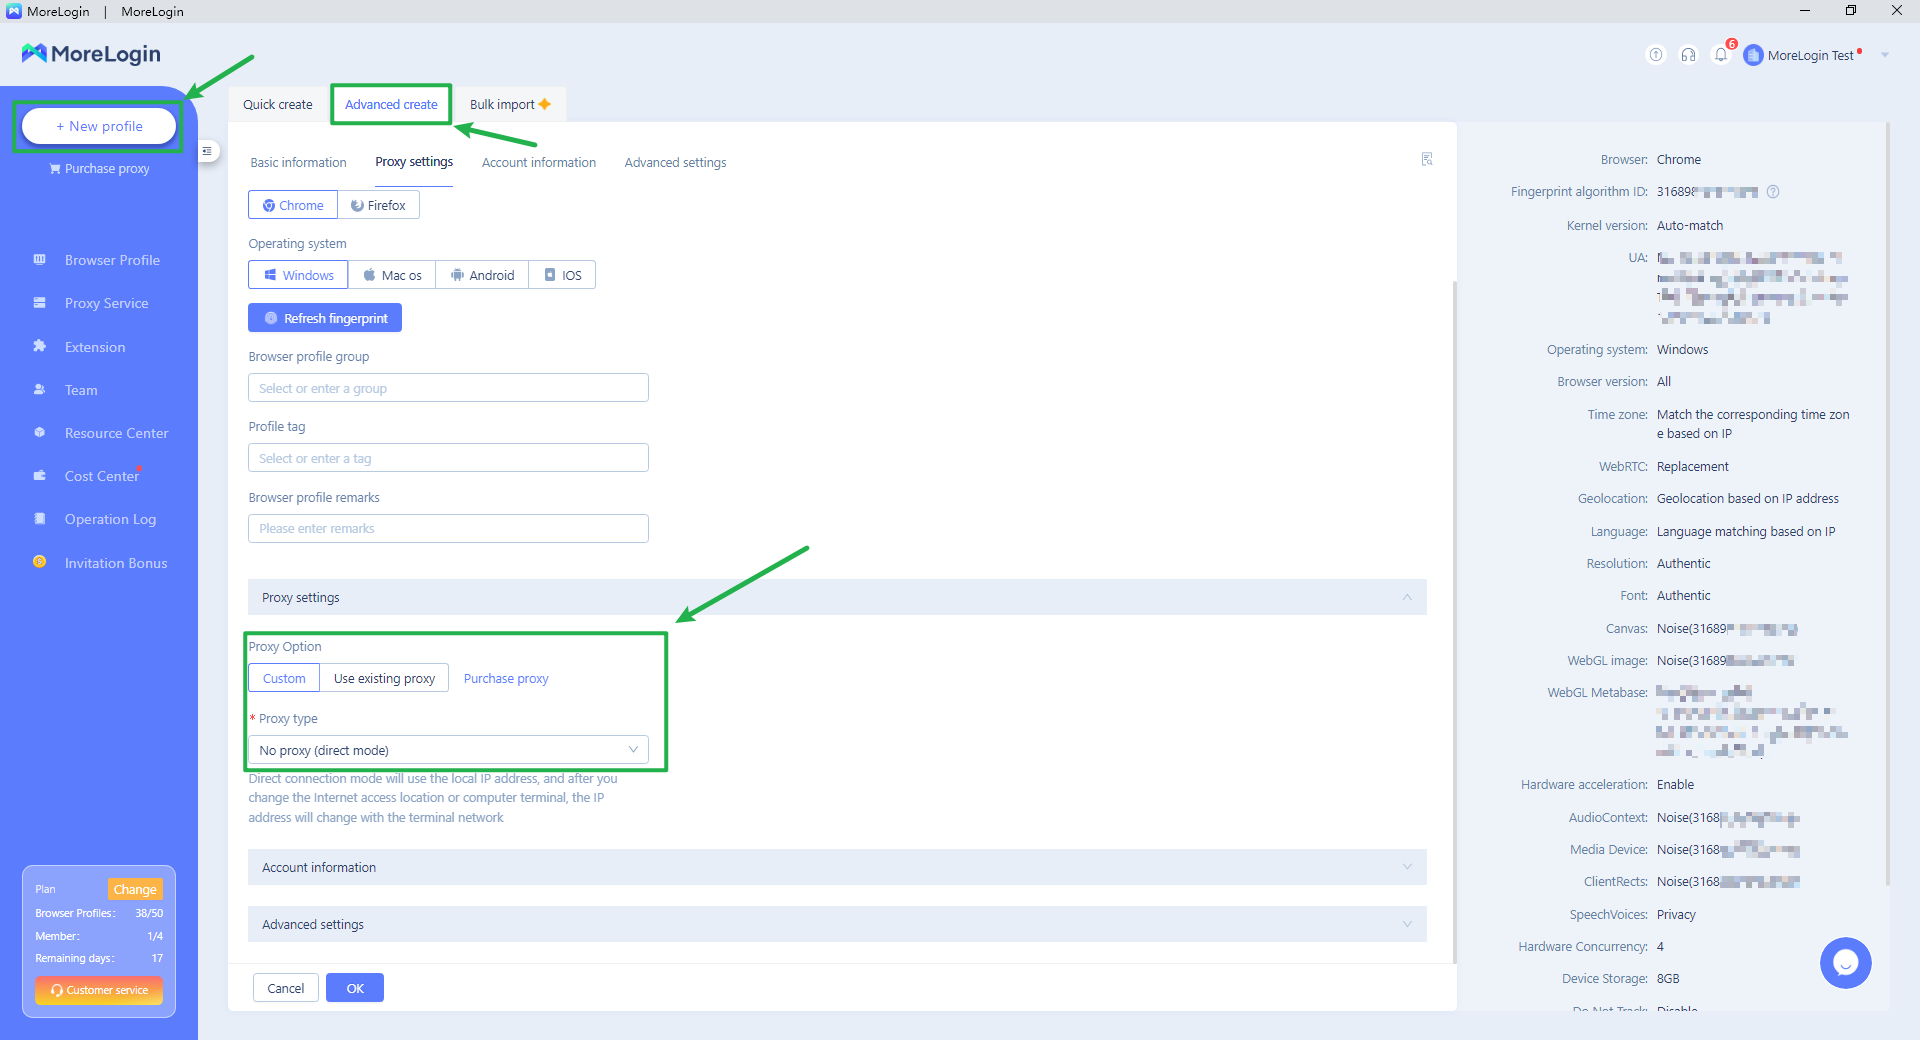
Click on + New profile on the left top of the App. MoreLogin will generate unique fingerprints for each profile, making sure of profile exclusiveness. Choose Advanced Create and Custom Proxy type.
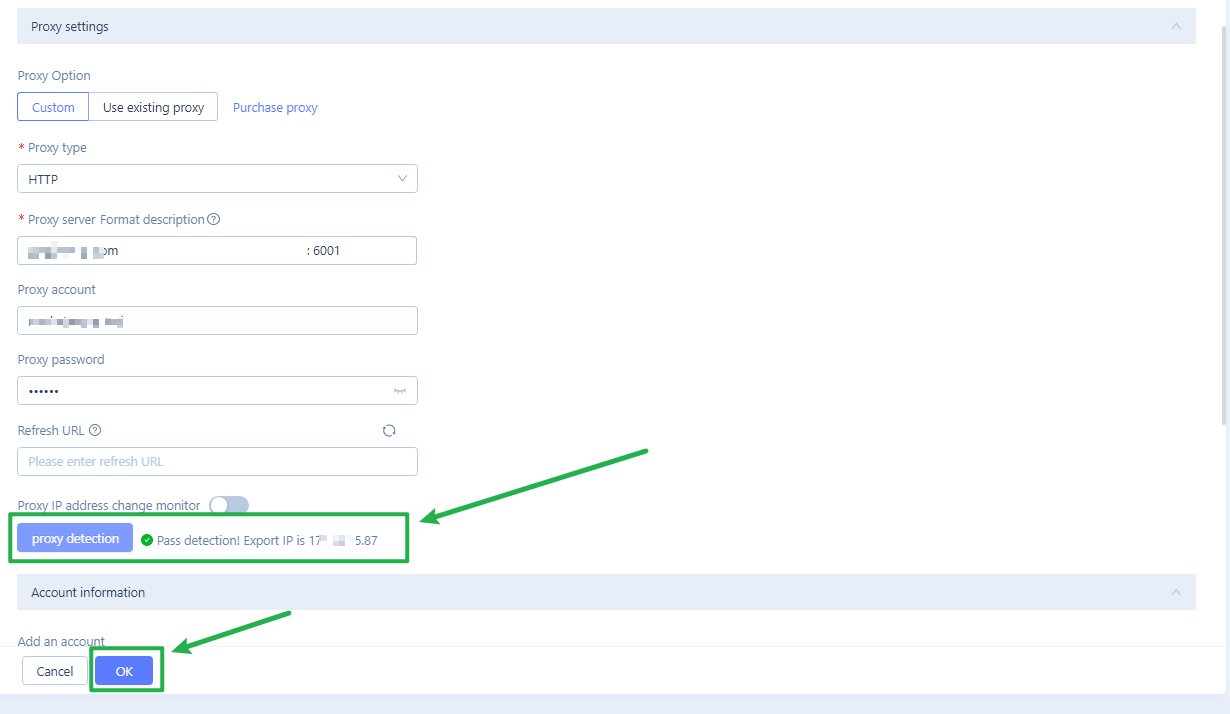
Choose the Proxy type that you bought from Infatica. Fill in the Proxy server format description.
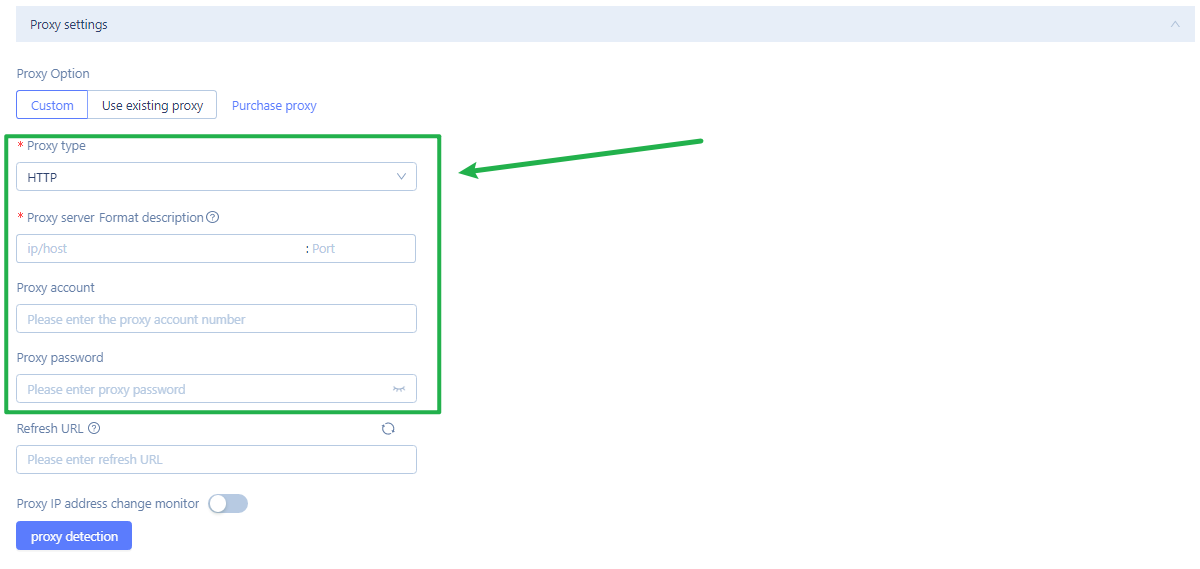
Click the proxy detection button. Click OK to save this profile setting if the proxy passes the detection and shows the export IP address.
Step 2.1. Batch Set Proxies (Optional)
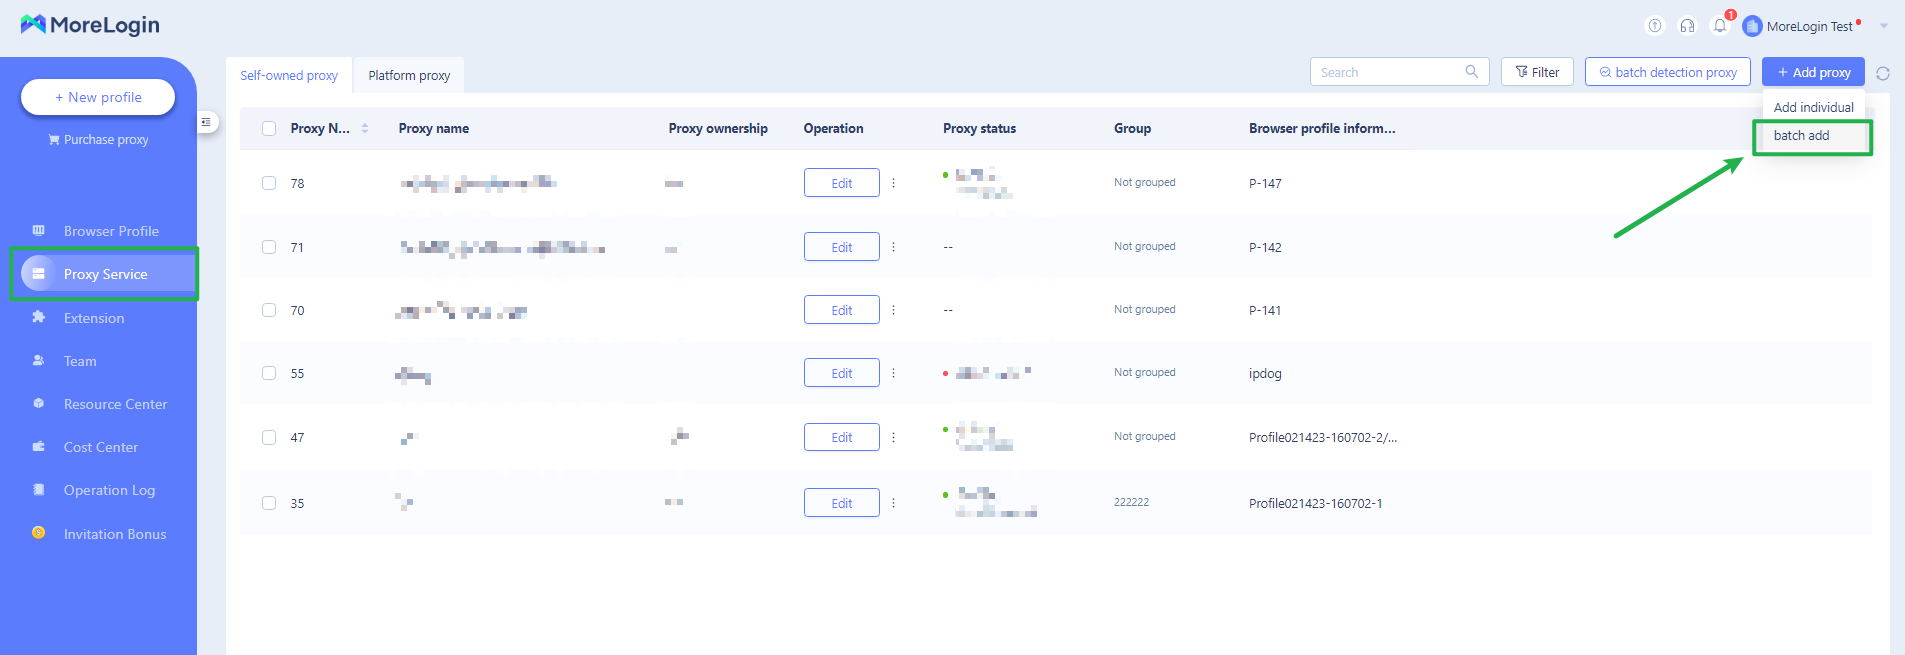
You can also add batch proxies on the Proxy Service page. Click batch add on the right top.
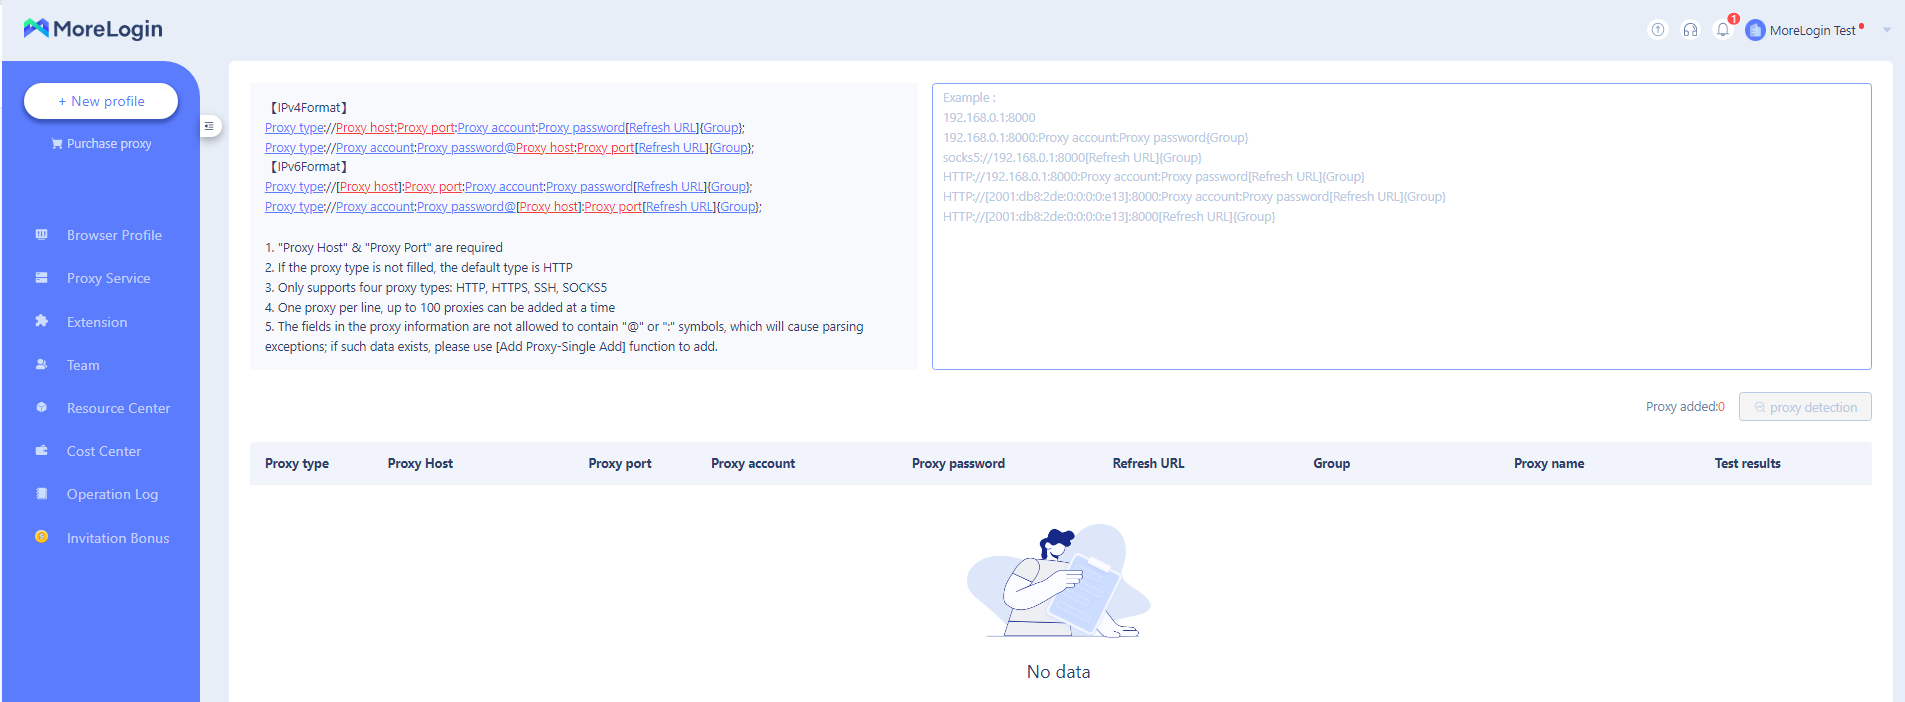
Fill in the blank as the sample.
Step 3. Start MoreLogin And Check For Leaks
Start the MoreLogin profile with the dedicated browser fingerprint and IP address.
This website will s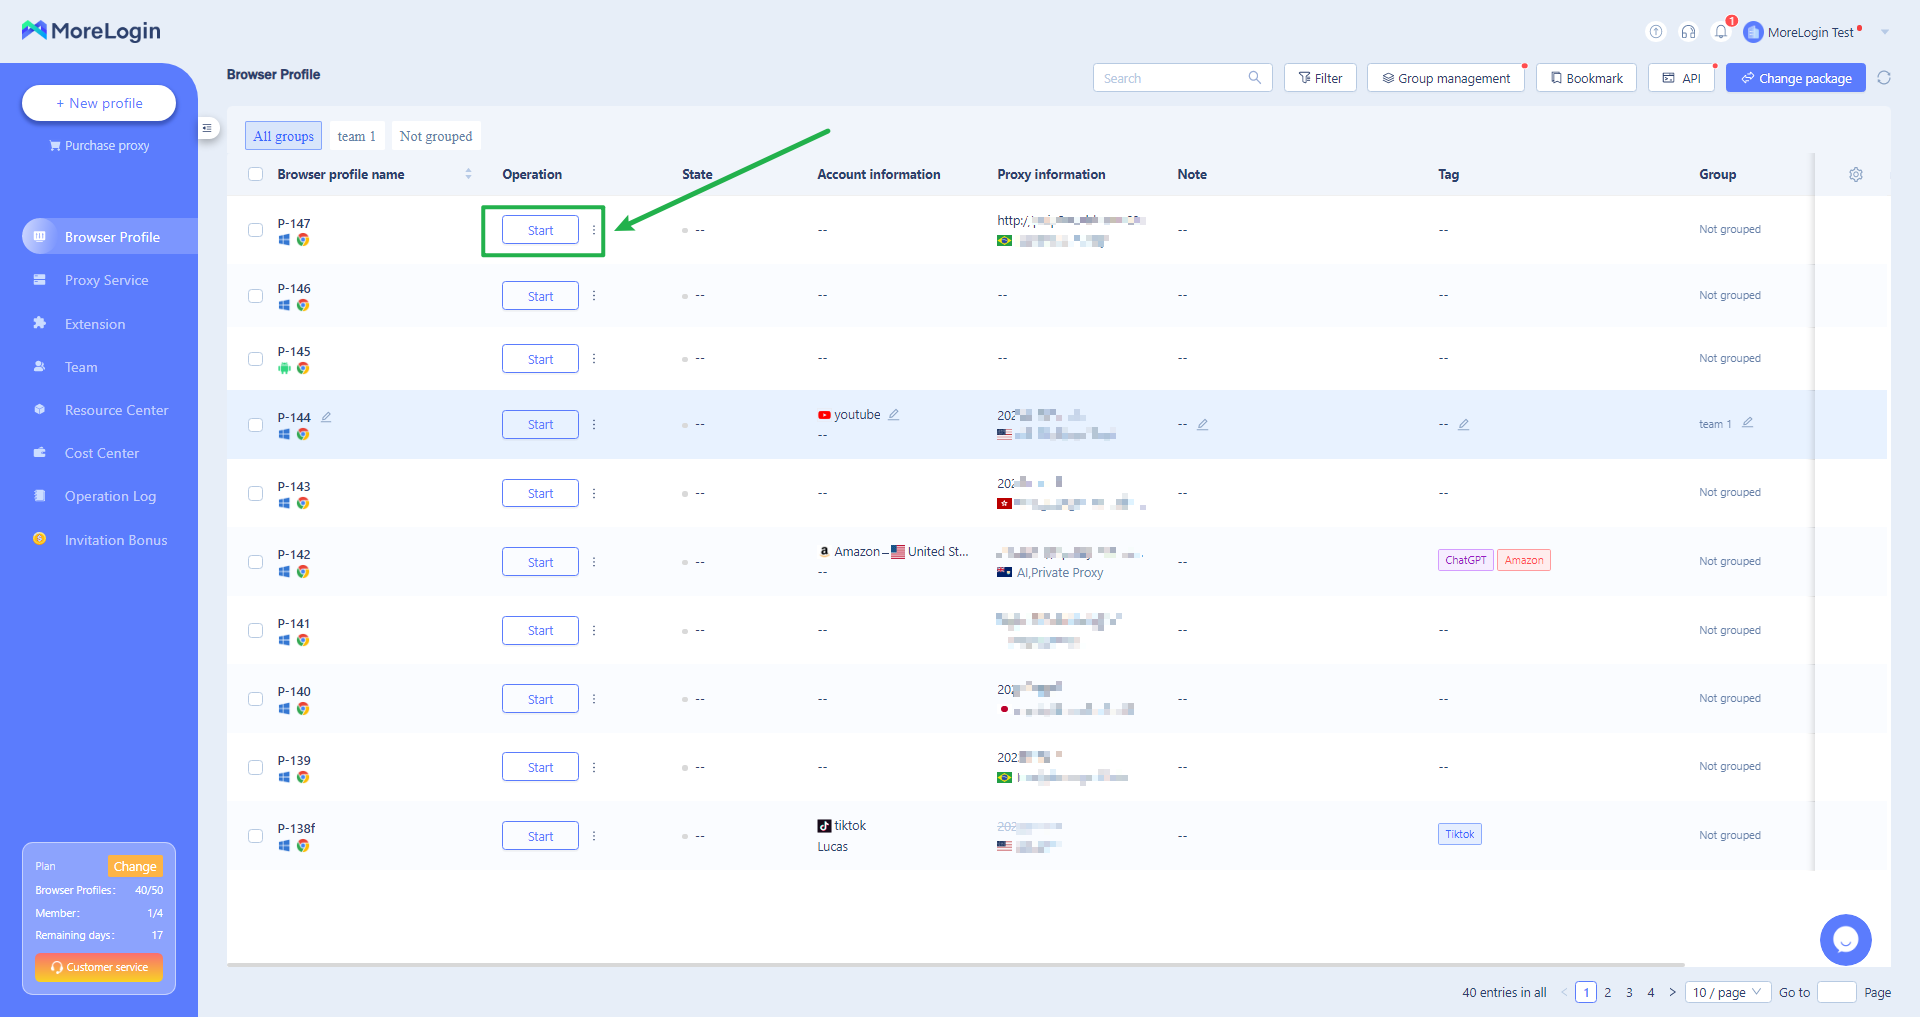 how do you know the IP address, location, and provider of your proxy. It will also show you other parameters that could reveal your identity, such as your browser fingerprint, WebRTC, and DNS. Ensure that everything matches your proxy settings and that there are no leaks.


